
How to pack a kitchen without breaking anything
How to pack a kitchen so nothing breaks: the materials, the order to work in, and the tricks that keep glass and ceramics intact.
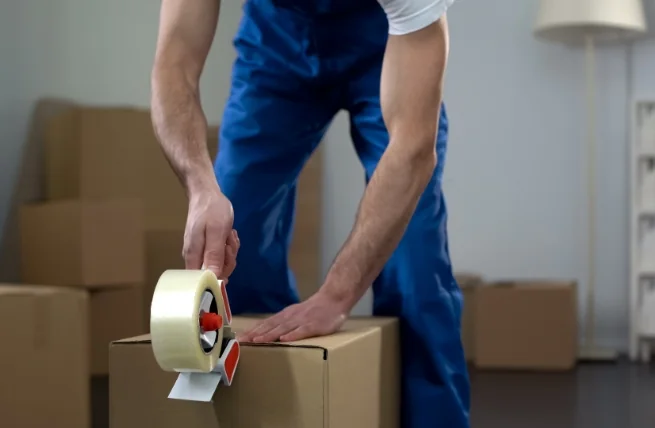
The kitchen is the room where most DIY-packing damage happens. It has the highest density of fragile items, the trickiest shapes (think coffee maker, stand mixer, glass cookware lids), and the most “I’ll throw it in a box at the last minute” temptation. After packing several hundred of them, here is exactly how we do it, and how you can too.
Quick answer
Pack the kitchen second-to-last, two days before the move. You’ll need 8 to 12 dish-pack boxes (small, double-walled), 2 rolls of packing paper, 1 roll of bubble wrap, 2 rolls of tape, and a few sheets of cardboard. Wrap plates vertically in stacks of four with paper between each. Wrap glasses individually with paper inside and out. Pack heavy items (cast iron, casseroles) low in the box, light items (mugs, mixing bowls) on top. Label every box “KITCHEN: FRAGILE: THIS SIDE UP.”
Materials
Buy these before you start, not as you go:
- 8 to 12 small dish-pack boxes. Small (1.5 cu ft) is the right size, bigger boxes get too heavy and crush their own contents. Look for “dish pack” or “double-walled” on the label.
- 2 rolls of unprinted packing paper. Newspaper works in a pinch but the ink transfers to white ceramics. Unprinted is worth the small premium.
- 1 roll of bubble wrap. Small-cell (3/16 inch) is fine; you only need the larger 1/2 inch for genuinely delicate items.
- 2 rolls of moving tape. 2-inch packing tape, not duct tape and not masking tape.
- A few flat pieces of cardboard. Cut from the flaps of an extra box, used as dividers between layers.
- A black marker. Or two, because one always disappears.
The order
Pack the kitchen in this specific sequence, it matches the order things will come back out:
- Decor and cookbooks (least essential, can pack first)
- Specialty appliances (stand mixer, food processor, espresso machine)
- Pantry dry goods in their own labeled box
- Cookware (pots, pans, baking sheets)
- Dishes, glasses, mugs (fragile, requires the most care)
- Silverware and utensils
- Daily-use items last: the coffee maker, one mug, one plate, one knife, salt and pepper. These get packed the morning of the move.
Packing plates and shallow bowls
This is where DIY packing fails most often. The standard mistake: stacking plates flat in the box. Stacked plates crack from vibration during transit, the weight of the top plates flexes the bottom ones with every bump in the road.
The right way:
- Lay out a sheet of packing paper.
- Place one plate in the center.
- Fold the paper over the plate, tuck the sides in.
- Repeat with three more plates, stacking each one in the paper-wrapped bundle.
- Add a final wrap of paper around the whole stack of four.
- Place the bundle vertically in the box, on its edge: like records or files. Not flat.
A box of plates packed this way can take a 3-foot drop without breaking. A box of flat-stacked plates can crack from being set down too hard on a kitchen counter.
Packing glasses and stemware
For every glass, wine glass, drinking glass, pint glass:
- Stuff packing paper inside the glass first. This is the most-skipped step and the biggest cause of broken glassware. The paper inside prevents the walls from flexing inward under pressure.
- Wrap the glass twice in packing paper. Twist the ends like a candy wrapper.
- For wine glasses and stemware, add one extra layer of bubble wrap around the stem.
Pack glasses upright in the box, surrounded by crushed paper. A common pro trick: put the heaviest glasses (pint glasses, lowballs) at the bottom and the lightest (stemware) at the top.
Packing pots, pans, and lids
Cast iron and stainless steel are nearly indestructible, they don’t need much. But lids do, and they’re often forgotten.
- Stack pots inside each other like Russian nesting dolls, with a piece of paper between each.
- Wrap glass lids individually in bubble wrap, then store them separately in the same box, padded with paper.
- Cast iron is heavy: never put more than two pieces in one box. Use a small box and let it weigh less. A 60-pound box of cookware is what crushes shoulders during a move.
Packing small appliances
A stand mixer, a food processor, a coffee maker, these have removable parts that get lost or shifted in transit.
For each appliance:
- Remove the detachable parts (bowls, attachments, carafes).
- Wrap each part individually in paper.
- Place the parts back into or around the main unit.
- Wrap the whole thing in a kitchen towel (kills two birds, the towels need to be packed anyway).
- Place it in a box, surrounded by crushed paper.
If you have the original box and Styrofoam inserts, use them. Especially for espresso machines and stand mixers, the original packaging is hard to beat.
Filling, labeling, and stacking
A common mistake: leaving empty space in the box. Empty space is where things shift, collide, and break. Every box of fragile items should be filled to the top, if there’s a gap, fill it with crushed paper.
Labeling. Every box gets, in clearly visible marker on at least two sides:
- KITCHEN
- FRAGILE (if it has anything breakable)
- THIS SIDE UP (with an arrow)
- A short content note: “Plates,” “Glasses,” “Pots,” “Pantry dry goods”
If you’re moving with a professional crew, this labeling helps them stage the boxes for unload, fragile boxes go in the truck last and come off first, and they get placed in the kitchen, not stacked in a hallway.
Pantry dry goods
Almost everyone packs their pantry with the implicit assumption that the move is one day. It usually isn’t, a long-distance move can be a week, sometimes more.
- Discard or donate anything close to expiry.
- Tape the lids on jars, oils, sauces, and vinegars. Double-bag bottles of olive oil and balsamic in zip-top plastic bags before they go in the box.
- Keep dry goods (flour, sugar, rice, pasta) sealed; if a bag is opened, tape it closed and put it inside a zip-top bag.
- Don’t move opened jars of anything that smells (peanut butter is the worst offender). Eat it or throw it out.
The day-of essentials box
The morning of the move, pack one separate box (or banker’s-style tote) that comes with you in the car, not on the truck:
- Coffee maker, one mug, one filter, ground coffee
- One plate, one bowl, one fork, one knife, one spoon per person
- A single chef’s knife and a cutting board
- Salt, pepper, dish soap, one sponge, a roll of paper towels
- Hand soap and a hand towel
This is what gets you through the first 24 hours at the new house without unpacking a single kitchen box.
When it’s worth hiring out
For most one-bedroom moves, DIY packing is genuinely cheaper. For a 3- or 4-bedroom kitchen, especially one with high-end cookware, an espresso machine, fine china, or a wine collection, full-service or fragile-only packing usually pays for itself. The labor cost is much less than replacing damaged items, and a crew that packs every day works faster and packs tighter than a homeowner.
We offer fragile-only packing across Middlesex, Monmouth, Union, and Somerset counties, typically scheduled two days before the residential move itself. The kitchen comes out first on unload, paired with the day-of-essentials box, you can have coffee Sunday morning before a single other box is opened.
If you are packing yourself to save money, it is worth knowing how that affects your claim if something breaks. A mover’s liability is usually different on boxes you packed than on boxes they packed, and the NJ Division of Consumer Affairs mover rules set out what a New Jersey mover has to disclose about it before the job.
Get a quote that includes the kitchen
Fresh Start Movers offers full and fragile-only packing across New Jersey. The kitchen is the room people most often hand over, and it is the one where it makes the most difference.
More from the truck.
Downsizing Into an Ocean County Adult Community
Downsizing into an Ocean County adult community is two jobs at once. What the communities require, and the order that makes it bearable.
Read Choosing a Mover in Central NJ: What Is Different Here
What makes a central New Jersey move different: shore traffic, barrier island access, pre war staircases, and the two licenses to check.
Read